Thursday, September 30, 2010

The Newest Dixie Arrived

This post has been edited. Edits are in red.
Dixie #4
This is probably in the best condition of any I've seen.
The back view.

This thing is in great shape. I doubt anyone ever played it. No fret wear even though it has old, rusty metal strings. I don't know how many folks play a Dixie with metal strings. With nylon strings these things are LOUD. I may or may not tighten these metal strings. I'm concerned that the tuning peg buttons may not be able to take the pressure it might take to tune metal strings.

What I was really wanting to see was the tuning pegs -- to compare them with the other three Dixie models.

Notice the dark lines running down the center of the buttons.
The pegs match the buttons of the third Dixie I acquired. That's the one that had a tuning peg button (the plastic part) split when trying to tune the instrument. That split appeared along the dark lines mentioned in the caption of the photo above.

I'm guessing, but I think these tuning pegs are original to the instrument since both sets (from Dixie 3 and 4) are in the same aged condition. Also, the screws match -- they have the built in washers.

The first things to corrode are usually the finish washers.
Luckily, as I've said in earlier posts, the finish washers are available at most local hardware stores. The finish washers are the raised things surrounding each tuning post.

This hardware matches that on the other Dixies.
No hardware was missing from this 4th Dixie. The neck adjustment set screws have not been used here to adjust the neck (covered in another post).

There's no gap between the neck and body (at the red arrow).
You can tell if the adjustment set screws are affecting the neck by looking for a gap. That gap would be between the neck and the body.

I don't think any one of the four Dixie's have an original bridge.

A fourth type bridge, this one a "Grover."
This is the first bridge that has been solid where the bridge presses against the head. After changing the strings and putting all chrome hardware on this Dixie, I set it up to play it the first time. That's when I discovered that strings 1 and 2 buzz on the first fret. That's because this model "Grover" bridge is too low. I may tighten the head, which would probably raise the strings enough not to buzz. Better still, I'll buy another bridge. Tightening an "aged" head can cause it to split. I suspect that when tightening a vellum head it may be best to wet it.

I'm going to take this one apart (maybe with the exception of loosening the head tension). I'll take a photo of the neck where it attaches to the body -- to see which of the other models it matches.

I did take the head off to clean the instrument. I also put all chrome hardware on it.
I think this one's not original and not vellum (calf skin). This is the top view.
Bottom view of the head. You can see the gap in the frame at the 6 o'clock position.

The head's attached to an aluminum frame.


Another view of the frame.


Like another model, the more or less rectangular hole space between the bolt holes is filled in.

I'll add a photo or movie of this "tricked out" instrument soon.

And here they are:

The posts and nuts are chrome.


Another view.

Another view with battery bracket (for lights)

The tail piece bolt is chrome plated too.


Tuesday, September 28, 2010

How Does One Set Up A Bridge? How Does One Replace Strings?

Have you ever noticed that your Dixie sounds out of tune as you play it on higher frets? You can fix that by adjusting the intonation of the instrument. Here's how.

Two different types of bridges.
As you probably know, the bridge is the device at the opposite end of the strings from the tuning pegs and the nut.

There are several things that affect the tuning of strings:
  • The length of the string (from nut to bridge).
  • The tension on the string.
  • The diameter of the string.
  • The tension on the banjolele's head.
  • The material the string is made with.
  • The weather (temperature, humidity, maybe barometric pressure).
Shorter strings vibrate faster than longer strings. Tighter strings vibrate faster than looser strings. Smaller diameter strings vibrate faster than larger diameter strings. Warmer strings vibrate faster then cooler strings. Humidity and barometric pressure can affect ears as well as the speed of travel of sound waves.

Faster vibration = higher pitch. Slower vibration = lower pitch.

You decide the diameter of your strings when you purchase them.

You control the tension of your strings by adjusting the tuning pegs and the banjolele's head tension.

You control the length of your strings by adjusting the bridge. But what is proper adjustment?

The rule I follow is that the strings should be in tune when played open and when played at an octave higher (the 12th fret).Doing whatever is required to get both in tune is called "adjusting the intonation."
  1. Using your ear or a tuning device, tune one of the strings to proper pitch by adjusting the tuning peg for that string.
  2. Play the same string while pressing the 12th fret.
  3. If the 12th fret tuning is flat (lower than the proper pitch), you need to shorten the distance from the 12th fret to the bridge. If the 12th fret tuning is sharp (higher than the proper pitch), you need to lengthen the distance from the 12th fret to the bridge.

    • The only way to do this is by moving the bridge. Yes, this will affect the open tuning of the string, but we'll take care of that as we go along.
    • To state the obvious, moving the bridge toward the 12th fret will shorten that distance (raise the pitch). Moving the bridge away from the 12th fret will lengthen that distance (lower the pitch).
    • How much should you adjust the bridge? If you're just learning this technique, start by getting the exact pitch at the 12th fret.
  4. Now check the pitch of the open string. It will probably need some adjustment using the tuning pegs.
  5. Recheck the tuning at the 12th fret and make any adjustments necessary.
  6. Recheck the open tuning and adjust.
  7. Get used to doing steps 5 and 6. You may end up doing that a lot on all four strings.
  8. Complete steps 1-7 for all four strings.
  9. Recheck the open and 12th fret tunings of all the strings. Tweak any that require it.
  10. You may find that the bridge ends up at an angle -- that's OK and happens a lot in my experience. If you look at the Dixie in the photo at the top of the blog, you'll see that bridge is at an angle.
  11. Notice that the tuning of an individual string can affect the tuning of all the other strings. You may have to meet a happy medium with your final setting so that the strings are as close to correct as possible.
  12. Over time, you'll learn how to make quicker adjustments by "almost" correcting the 12th fret tuning so that a proper open tuning will bring the 12th fret to perfect tuning.
"So," you say, "I'll put a pencil mark so I always know where to set the bridge." In a perfect world, this would work. The problem is that all strings are not created equal (even if you always buy the same set). Very minor variations in string diameter and string material (gut, nylon, steel, whatever) will affect the 12th fret tuning.

Many stringed instruments have individual string adjustments for intonation, so there's no need to move the bridge. These are usually devices that move each individual string slot of the bridge.

Restringing --

While I'm at it, let me share with you one way to avoid string slippage when re-stringing with either nylon or steel strings.

First, make sure that you have enough string to fit the instrument :-) This will let you know how much extra you have to work with.

Replace one string at a time. Keep the old strings in place and leave them as tuned. This keeps the bridge in place and proper tension on everything while you're replacing each string.

On one end of the string, do a surgeon's knot by forming a loop and passing the end of the string through the loop 2-3 times. Larger diameter strings will easily get by with two passes through. This knotted end of the string becomes the tail end.

Three times is probably overkill for this gauge string.
Since this string is nylon, it would make it easier to tighten the knot by wetting it. If you do that, make sure to dry it off good before putting it on the instrument.

The tightened surgeon's knot.
You only need to hand tighten the knot. If you trim the "tail" of the string at the top of the photo above, make sure not to trim it so much that it will slip back through the knot. By the way, I ended up only using two passes through for this knot.

The knot goes below the tail piece -- string up through the hole/slot.
In the photo above, I'm replacing metal strings with black nylon strings. The metal strings came with the Dixie when I bought it. The pencil bridge marks you see will do me no good for setting proper intonation. The nylon strings will most certainly change that setting.

This knot will tighten more when you tune the string. This will require that you keep tuning the string until the knot is as tight as it is going to get.

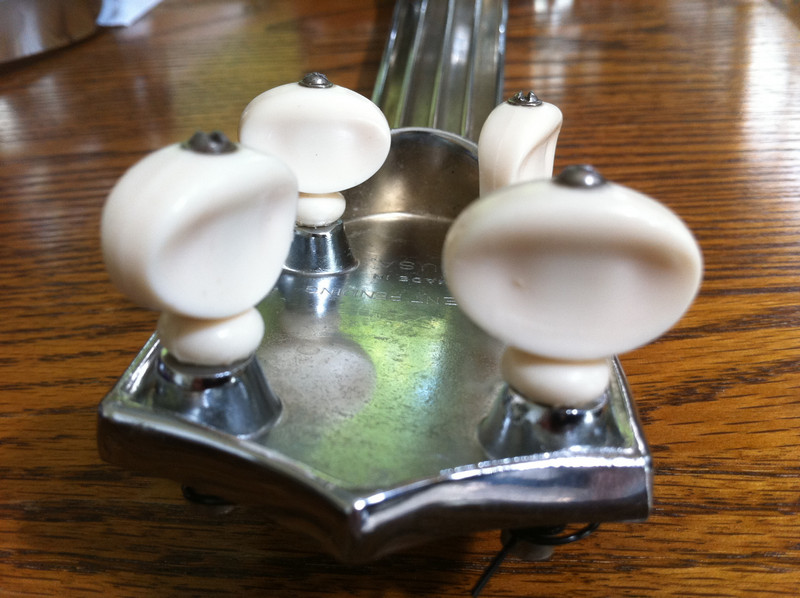
Feed the string through the hole in the tuning peg.
Notice that I've not removed all of the strings -- just the one I'm presently replacing. This helps me to remember the rule that "strings wind around the tuning peg from the center of the instrument to the side." The center is where the "X" in Dixie is, between strings two and three. So, the strings closest to you in the photo above (strings three and four) wrap around the tuning peg from the X (inside) toward you or the outside.

String numbering -- what's with that? String 1 is the string toward your feet when you're playing. To really confuse things, that same string is also called the top string. This sounds like a perfect "who's on first" scenario :-) The way to remember it is that usually the highest pitched string is string number 1, and # 1 is always on top. Also, string 1 is usually the highest pitched string, making it the top pitch.

So, string 1 is also called the top string, but it's on the bottom when you're playing the instrument.

String 4 is also called the bottom string, but it's on the top when you're playing the instrument.

What if you wind the string the wrong way? It might make the inner strings (2 and 3) rub against the tuning pegs of the outer strings (1 and 4). That may cause unwanted vibration/noise. Otherwise, the instrument would still work.

If you do wind a string the wrong way, just loosen it and restring it the proper way.

Put the string through the peg hole twice to form the loop you see.
It doesn't matter which way you put the loop above, but this one little thing will limit string slippage a lot.

How much string does one need to leave loose between the tuning peg and the tail piece so we have some string to wind around the tuning peg?

I use two to three fingers at the 12th fret.
 Before I tighten the loop, I make sure there's enough string to go around the tuning peg at least twice. For all but the thickest strings, I find that two fingers is enough. While I'm raising the string two fingers at the 12th fret, I pull on the loop at the peg until the string is fairly tight against my fingers.

Pull the loop tight.
Try to keep the loop tight as you tighten the string. Also, keep the string relatively tight between the tuning peg and the bridge so it wraps snugly around the tuning peg.

This is a view of another 4th string I'm replacing.
Notice that the string is wound tightly around the peg.

Tune the string. It will quickly go out of tune because of knot tightening and stretching. No problem. That's normal. It may take several hours (or even days) before it stays in tune.

Most important! Be extremely careful trimming the string's extra "tail" at either end of the string. It's easy to accidentally cut the string itself. If you do cut the string and it is too short to use as cut, it may still be usable if you read up on knots to re-attach the two pieces back together.

I hope this information is helpful in some way.

Tuesday, September 21, 2010

Something's Buzzing (and the strings are clear of the frets)

This post has been edited, with edits in red.
 
Just a quick note to say that I've found that buzzing can sound like it's coming from one location on the Dixie when, in fact, it's coming from a completely different place.

The head picks up vibrations from anywhere on the Dixie -- it acts just like an amplifier.

Damping a part will not necessarily tell you if that part is the culprit.

Damping the head may well reduce/remove the buzz, but chances are "it ain't the head that's buzzing."

In my experience, buzzing has usually either been caused by a loose part, or by a string buzzing against the "nut," or by a string (or strings) not being trimmed at the tail piece (knot) end of the string.
The "nut" is to the left of the yellow rubber bands.
The nut has slots to keep the strings aligned.

On the Dixie, the slots can be pretty wide -- wider than the strings. This can cause buzzing that runs down the string to the bridge, directly to the head.

My fix for it here is to tie an extra piece of string around the four strings to pull the outside strings toward the inside of the slots they rest in. It's a loop around the strings, not the neck. I've also used a piece of elastic to do this, but I didn't have any that was small enough.

To keep the "string loop" tight against the nut, I doubled a yellow rubber band and pushed it against the loop so it stays against the nut.

Well, it does work :-)

And you can tell which string is the culprit in this scenario. The frequency of the buzz will be the frequency of the string. Listen to the buzz, hum it and play each string until you find what you're humming.

Sometimes I'm in a hurry when changing strings, and I leave too much string on the knot end of the string. Those "string tails" hit the head, and they will buzz like crazy. Trim the extra string at the knot end close to the knot so none of the free end of the string hits the head.

Peg O' My Heart

TUNING PEGS! The older, plastic buttons can just crumble in your fingers. Some of you might say, "No problem, just get out the really small vice grips and keep on strummin'!" So, what's those of us without vice grips to do?

Finding pegs with the correct size shaft seems to be impossible today. They've added 1/16 of an inch or more to the minimum size diameter available. For a wooden instrument, this is not much of a problem. For the Dixie, it's a problem that will definitely require careful consideration.
  • Do I want to modify an antique instrument?
  • Do I have access to a drill press and carbide drill bits?
  • Will the "standard" peg diameter change again?
  • What if I eventually find some original diameter replacement pegs?
I am facing the replacement of a full set because one button cracked. Many internet sales sites list sets but fail to state the diameter. "Fits most ukuleles" is not a very helpful statement.

According to an email I received from Joe at Elderly Instruments (elderly.com), "the closest tuners we have [for a Dixie banjolele] are stock # UP26.  The shaft is slightly larger, so you will need to enlarge the hole in the peghead from 0.15" to 0.19".  That is from 5/32" to 3/16" approximately.  I hope this helps." It did help -- especially the exact measurements. I bought a set of the UP26 pegs ($8.95 at the time). I have yet to use them. I keep hanging onto hope that I'll find some that are the correct size.


UP26 Peg from Elderly Instruments
  • The part of the shaft (on the left) that goes into the button, is square. This is a good design -- much better than having two sides square and two rounded off.
  • The metal rings next to the shaft are (from the top) top and bottom view of what comes with the peg, and a finish washer which did not come with the peg. 
  • The bottom of the ring that comes with the peg is made to fit countersunk into the instrument. This would work easily with a wooden banjolele. For the Dixie, you'd have to have a matching countersink hole drilled. Otherwise, this part would sit up on the Dixie and look sorta strange. Wish I could show you on a Dixie, but I haven't enlarged a hole to see this peg in place. The bottom ring is a #6 Finish Washer (available at a hardware store). I would use it in the place of the ring that came with this peg so I don't have to drill a countersink hole. Besides, what if the peg designs change and a different (or no) countersink hole is required?
  • The plastic rings are top and bottom view. This is what causes friction between the peg and the peg head. It is obviously made for a wooden instrument. The side that goes toward the instrument has raised lines which would keep it from slipping on wood. The other side is a bowl that the button fits into. It may be possible to use this piece, even though it is redundant for a Dixie, since the Dixie has the metal "bowl" built in. Using the plastic on top of the metal might look funny, but you'd have plastic against plastic for friction as opposed to having a plastic button against a metal bowl (and possible faster wear).
  • The screw has one of the heads that will allow either a flat head or a Phillips screwdriver. I always use a Phillips screw/screw driver as they are much less likely to mess the head up.

Here are the pegs from the original "Red" model and the "Black" model, side by side:
Oh, how I'd love to run into a few sets of the peg on the left. See the metal above the button? It provides the friction against the Dixie's lower friction "bowl." Metal against metal plus WD-40 equals lifetime operation. The plastic button on the right is both the friction provider and the button. The peg on the left was on my mother-in-law's "Red" Dixie when it was given to her in the 1950's. I do not think it is what originally came with that model. Since the original owner owned a music store, he may have replaced the original pegs with the best ones available at the time.

I had to replace the screws on the peg type on the left. They were flat head and totally impossible to tighten. I found Phillips head type and added a lock washer sandwiched between two flat washers to keep it rock steady on the tuning.

Side views.

You may notice that the top of the shaft (with the hole for the string), is longer on the metal friction peg.

The all plastic button/friction model taken apart.
This may be an original peg for a Dixie. The washer between the tuning head and the shaft is the #6 finish washer. They are readily available at your local hardware store. This one's original with this Dixie, so it's not shiney. The screw that holds it all together is in the button. It has a washer "built in."

The shaft on this peg has two flat and two rounded sides. You can "sort of" see it in the photo below. From the screw hole end it would look like (_) (you can provide the straight line connecting the top of the parentheses :-)

The plastic/metal button peg.

That's a #6 finish washer and a #3 flat washer. The same washers and screw works for all the original pegs on the Dixie's we own.

Here's a closeup of the metal friction piece above. It has a slot where the button fits:
The button "nestles" in the slot you see.
Here's a third type peg from the third model we own (played daily by my wife, so I won't be able to show things taken apart).
These have been trouble free. They have flat head screws with a washer built in. This model of the Dixie had no paint, and I don't know if it ever had any. I suspect a former owner cleaned it and removed any paint. The chrome on this one's pristine. Except for the head, the whole banjolele looks new.

So, my experience has been three different pegs on three different Dixie's.

I'd be interested to hear what type pegs you have. Photos would be great. Maybe we'll get to the bottom of which pegs are truly the original. As I type this, our fourth (and possibly final) Dixie is in transit. It looks to be in very good shape. Maybe it has a fourth type of peg? We'll see.


Monday, September 20, 2010

Thinking about re-chroming a Dixie?

I thought re-chroming might be a good idea, until I saw this entry on ehow:

www.ehow.com

Yikes! What about keeping fret height and such? I'm going to check with a local chrome plater to see what might be possible.

Chrome Hardware

10-24 chrome threaded stock doesn't seem to be available (via Google search). I did find some chrome 1 inch 10-24 bolts, and you could cut the heads off and put the cut end into the tension ring. They are presently $1.16 each at http://www.allensfasteners.com (do a search on that site for "chrome bolt").While you're at it, pick up an extra to use for the tail piece bolt. A button head allen bolt would be a good choice to keep a low profile around the tail piece.

At that same site, you can get 10-24 chrome nuts. Do a site search for "chrome nut" and look on that page for HEX NUT CHROME (COURSE). They're presently $.44 each.


Finding Parts

Here is a list of the hardware parts with photos. Tuning pegs are excluded from this list, as they will be covered in another post.

Sorry for the small type -- getting used to blog photo limitations.
  1. Neck adjustment set screws -- two required (far left is an Ace Hardware available replacement, right is the original).

    • The proper size is 5/16 X 18 X 5/16. That means the diameter of the threaded part is 5/16 inch, there are 18 threads per inch, and the length of the threaded part is 5/16 inch. 
    • The original is slotted -- the replacement is hex. If you go with hex, make sure to pick up an Allen wrench that fits it.
  2. Neck attachment bolts -- two required.

    Set screws and bolts as seen from bottom of body
    • An original Dixie has two different sizes. The one at the bottom of the body (the top one in the photo above) is 1/4 X 20 X 1/2.  The diameter of the threads is 1/4 inch, there are 20 threads per inch, and the length of the threaded part is 1/2 inch. The one at the top of the body (nearest the set screws is 1/4 X 20 X 5/8. The diameter of the threads is 1/4 inch, there are 20 threads per inch, and the length of the threaded part is 5/8 inch.
    • The locally available replacement is hex. Again, don't forget a proper sized Allen wrench.
  3.  Head tension nuts - eight required.
    • The proper size is 10-24. 
    • Readily available locally.
    • Keep some extras in your banjolele took kit if you don't use lock washers.
  4.  Lock washer -- eight required, if you use them.
    • The proper size is #10.
    • In my experience, THE part most missing from Dixie's is one or more tension nuts.
    • If all of the nuts have equal tension, they should not vibrate loose. But, it's difficult to judge tension (unless you use a torque wrench or the "lock washer" method, below).
    • As long as a lock washer is fully flattened between the nut and the body of the banjolele, it will keep the nut from vibrating off.
    • The "lock washer" method of equal tension: tightening the nuts as you do lugs on a wheel, if you watch for when each lock washer flattens, you'll know that all the nuts are at the same tension. Then you can keep track of the number of turns (or partial turns) you use from that point on. This way, the nuts should all remain at the same tension. Go slow. Tighten a small amount at a time. Never tighten a nut that's adjacent (or close to) to the one you just tightened. Jump from side to side when tightening.
  5.  Tail piece bolt -- one required.

    Tail piece bolt is at the very top of this photo.
    • The proper size is 10-24 X 1/2 inch. Whoops! I just removed the tail piece from the "Black" model Dixie, and it has a 3/8 inch long bolt. I got the 1/2 inch measurement from the "Red" model. I would prefer the 1/2 inch for adjustment purposes. It looks like there are no clearance problems for even a much longer bolt. The bolt hole is threaded all the way through the tension ring, and there's even a non threaded hole in the body below that.
    • Same size as the eight threaded stock pieces on the head tension ring (the tension ring is in the photo below).
    • The tail piece (which anchors the ends of the strings) is attached to the head tension ring (photo above and below). Sometimes it hits the body of the banjolele. You could raise the tail piece so this doesn't happen. An extra 10-24 nut would help here. You'd take the tail piece loose and sandwich the tail piece between the head of the tail piece bolt and the nut. Then you'd adjust the bolt height for clearance. If more clearance is needed, you could sandwich the tail piece between two 10-24 nuts. The reason I bring this up is that replacement drum heads may require tightening the head tension nuts a good bit more than required by an original head.
  6. Threaded stock -- eight required.

    Threaded stock and tension ring.
    • The proper size is 10-24 X 1 inch (measurement taken from a known all original part Dixie).
    • ~3/16 inch is screwed into the tension ring.
    • The threaded stock in the photo above was removed from the hole above it.
  7. I've looked on the internet for replacement parts, and there is a wide variety of choices -- much better than taking whatever is available locally. It would make sense to try to keep the parts as compatible as possible -- like all Allen wrench, all slotted, all Phillips, etc.
  8. What would be super cool would be to have all chrome hardware for the parts that are visible while playing. There are some chrome pieces available. In a future post, I'll try to list what I've run upon in this regard.
  9. Stainless steel would be a good idea for the hardware, too.

Sunday, September 19, 2010

Finding A 7" Head

The only "ready made" head that might have a chance to fit the Dixie is one made by Remo. I'm trying it and will let you know what happens.

The model number is M6-R715-S4-SD003. It's a conga head, so the "collar" might be too deep. But, I measured the Dixie and it looks like there's a maximum of ~1 inch of play in the tensioner.

This head measures 7.15" and the Dixie requires a 7".

Keep your fingers crossed. I'll post my results.

How did I get involved with the Dixie Banjolele?

My wife is a fulltime entertainer. By that, I mean it is her 40 hour a week passion that she happens to get paid for. My mother-in-love (law) is a lifetime entertainer. She learned to play a ukulele back in the 1950's. Since she did a good bit of live entertainment, she needed a ukulele that had some volume. It happened that a friend who owned a music store gave her a Dixie Banjolele. She used it a lot..

Then she gave it to my wife, who used it a lot. Unfortunately, I did not take a picture of it before I started this blog, and, as you will see, it's in parts for cleaning/repair.

Here's the neck where you can see the obvious wear.

What I'll call the "Red" model.

Yes, the chrome is gone on the lower frets. Note the red paint that outlines "Dixie" on the headstock. There's red paint inside the body, too. I know that this banjolele is all original (except maybe for the tuning pegs) since I know the original owner. We'll make use of that information as this blog grows.

Here are some other parts of the "Red" model:

Bottom view of the head.

Notice that it is tied onto the metal ring that is used in tensioning the head. I believe this is a "vellum" head, but cannot swear to it. Vellum is made from calfskin. I know enough about this to be dangerous, so I'll leave it at that right now.


Top view of the head.


Full bottom view of head.
Upper frets -- DIRTY!
This is a good time to say that this banjolele has to be kept clean after every use. The salt and oil from your hands will corrode the metal. I should have cleaned old "Red" long before now, before it was put away. It got put away when we bought another Dixie in superior shape (the third one). My wife keeps it sparkling clean, and wipes it down several times a day :-) It's the one ahown at the top of the blog.

"Red's" original bridge at the top.
A second banjolele was purchased a few years back. It has black paint where "Red" has red paint. The photo above shows the bridge that came with my mother-in-law's "Red" and the bridge that came with the second banjolele, which we'll now call "Black."

The "Black" model.
The "Black" model is in very good to excellent condition. It went out of service when one of the plastic tuning peg "chicklets" cracked. I have been unable to find a modern replacement that is this same size. So, I took the tuners off "Red" temporarily to use them on this model.

This photo does not show it very clearly, but the chrome is partially worn off on the lower few frets. I see what I think is brass underneath. The head shown above is the head from "Red" since "Black's" head had a split in it.

"Black" head.
Here, I've taken the metal wire from the head. I don't know if the head was originally attached to the retaining wire or if it became stuck to it when the head dried and stiffened up (I think this head is vellum, too).

"Black" neck on left, "Red" neck on right.
The only other difference I see between the "Red" and "Black" model metal parts is the filled in hole between the threaded holes where the neck attaches to the body. (Sorry for the small type on the photo).

Neck attachment/adjustment hardware (upside down view).
Notice the black paint. I do not know for sure if this model actually had black paint (or any paint at all) when it was new. The "Red" model was missing one of the larger bolts when I first worked on it. It was also missing one of the smaller set screws. Note that if the head were installed here, it would be at the bottom of the photo. This body piece is upside down.

I've learned that for at least three Dixie Banjoleles no neck adjustment is required. That means that the set screws are not pushing against the neck except enough to keep them from vibrating out.

My opinion on making adjustments here:
  • If the banjolele is working well and you like the way things are, don't make any adjustments.
  • If you do need to make an adjustment, take photos of all angles of the neck/body connection so you'll know where you started. Take special note of the gap between the neck and the body.
  • I'm assuming that you're making these adjustments with the strings on and at pitch (tuned).
  • For purposes of up/down and raise/lower I'm assuming that you are viewing your Dixie flat on it's back, strings, frets and head up.
  • If the set screws are in use at all (they're not loose or are not easily loosened with light pressure), they are effectively tilting the neck down. Another way to say this is that it is lowering the headstock and tuning pegs, causing the strings to be closer to the frets. If your strings are buzzing against the upper frets (the frets near the body) or are buzzing against the body, you need to back the set screws out, effectively raising the strings.
  • Before you make any adjustments, you should realize that the two big bolts have to be adjusted in concert with the set screws. So, the first step is to loosen both of the larger bolts before making any adjustments
  • If you are making an adjustment to the set screws and you start meeting resistance, remember to loosen the big bolts some more.
  • Each time you make set screw adjustments, you will only know the full effect of your adjustment by tightening the lower bolt. That results in lowering the neck even more.
  • Play with the set screw/lower bolt adjustment. Don't worry about the upper bolt until you have everything set the way you want it.
  • Finally, tighten the upper bolt, but only enough to keep it from vibrating loose. It's major purpose as far as I can tell is to keep the set screws from vibrating loose.
  • I have effectively played one of our Dixie's with only the lower bolt in place.
  • Finally, as I said above, I have never had to use the set screws. To do so made the strings buzz against the upper frets.
I hope this post helps someone. Please comment with your own opinions/thoughts/experiences.

The next post, I'll be listing part sizes and talking about tuning pegs.

Pulling Together Information On The Dixie Banjolele

The purpose of this blog is to collect and share information about the Dixie Banjolele, which was made in the 1940-50 era. The Dixie is made out of metal -- cast aluminum. I've tested it with a magnet, and nothing but the hardware attracts the magnet.